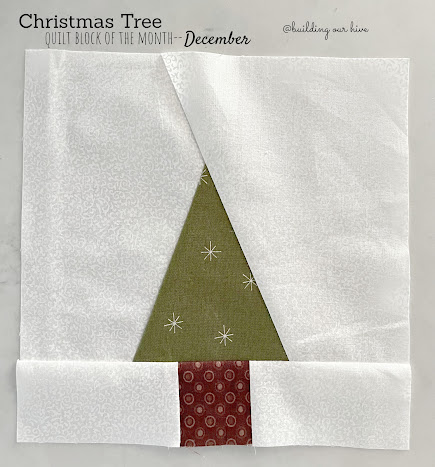
Christmas Tree- Quilt Block of the Month- December
This is our last block of the month!
Now that you are "seasoned" quilt block makers,
we are tackling one that is a little tricky.
But it sure is cute!
You'll need 1/4 yard of a background color, brown for the trunk and green for the tree.
Out of the background, cut 2 strips 2"x4"
out of brown cut 1 square 2"x2"
Sew these together with the brown in the middle.
Iron seams.
Cut a 4"x6" rectangle out of the green fabric.
On the back of the fabric,
find the middle at the top and draw a diagonal from this point to each side bottom corner.
Cut out the triangle.
(I don't know why the tree fabric here looks brown but it's really green ;)
I really wanted the tree not to touch the top of my block
like in some tree block tutorials.
So this is where it gets tricky,
because I was winging it.
You can find a great tree pattern from Allison {here}
to make things easier.
If you're still with me, here we go:
Cut a large 9"x 9" square out of the background fabric.
Place your tree triangle in the center.
Fold your triangle over to the left and sew it down to the background.
Fold it over and iron, so right sides are facing up.
No photo here, but we have a diagram.
Put your ruler along the left side of tree triangle.
(the right side is sewn down to the background piece.
Cut.
Place that cut piece on top of the tree piece, with right sides together.
Sew along this edge.
Iron.
You can see that sewn diagonal edge here:
Place the tree bottom piece at the bottom, centering the trunk in the middle of the tree.
Sew along the bottom edge. Iron open.
Trim all sides so you get an 8"x 8" square.
Print a copy of the pattern
We did it!
A whole year of quilt blocks!
I'm feeling so good about finally accomplishing this
project that I've had on my mind for years.
You can find all 12 blocks {here}
Hopefully you've enjoyed this journey too
and have found some block styles that you really like,
then you can make a whole quilt out of the block style you love.
In the new year,
look for the next step of connecting the blocks and binding a quilt!


What a fun block! Thanks for joining in on Home Matters Linky Party! I will be featuring your post this week! #HomeMattersParty xx
ReplyDelete